
Whether it’s your first attempt to brew a cup of coffee or you’re a regular, we are here to share our knowledge and hopefully you will discover why we are the only go place to elevate your game.
In a world drowning in text, we are a big fan of concision. We have tried our best to summarize each brewing concept. Obviously, these methods are not intended to be black and white absolutes, but rather they are guard rails meant to offer their essence to provoke curiosity and hopefully grant you liberty to discover your sweet spot in the coffee. Always remember; Coffee is a personal statement; be the captain of your own cup and brew it to your preference. Your way is the best way! And it will always be the most b-e-a-u-t-i-f-u-l.
Brewology
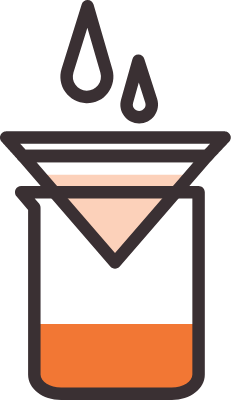

Chemex
The Chemex was invented by Peter Schlumbohm in 1941 in Chicago USA. Peter was a chemist and a curious mind. He understood the extraction of flavor very well. This resulted in the design of Chemex that has remained one of the most beautiful, sophisticated and functional ‘must have’ coffee brewing equipment for coffee aficionados.
The filter paper used in Chemex is relatively thicker and creates an incredible crisp clean brew.
Brew Guide
4 min
Medium Coarse
33g
500ml/95C
Preparation
First, boil clean filtered water (avoid hard water) to 95 degrees C. Weigh the needed coffee beans and grind them to a medium coarse setting. Fold your filter paper and place it at the top of the Chemex. Wet the paper with hot water. This will help to pre-warm your Chemex jar and help the filter paper to grip to the sides of the glass and at the same time get rid of the unpleasant papery tastes. Empty this water through the spout before you begin brewing.
Add the Coffee
Carefully pour your coffee into the centre of the filter on your Chemex. Avoid the wet sides to minimize sticking. Shake the Chemex and give it a gentle nudge to flatten the top of your coffee heap, using your index finger to make a small hole in the middle of your ground coffee.
Brewing
Place your Chemex set up on top of a digital scale and start your timer. Make the first pour that is sufficient to cover all the dry grounds and allow for BLOOM. Allow for 20 secs as the coffee degasses.
Start pouring your water in a gentle circular motion for 30 secs upto 100g and wait for 15 secs. Repeat the pouring process for another 30 secs with a 15 sec break until you reach the 500g/500ml goal.
Let your coffee brew and filter through to the last drop. Some brews may run faster and this may require adjustment to the grind level and vice versa if the brew runs slower. However, the most important thing is how good the coffee tastes hence feel free to feed your curiosity and make adjustments.
Final Pour
Once the brew is finished, can evaluate your pouring skills by checking if the ground bed at the top of the filter is flat or has gulleys. If one side is higher than the other, you may need to level up your game because this might be an indication that some parts of your coffee may have been over or under extracted.
Swirl, serve and ENJOY!
Get the Gear
-
 Select options This product has multiple variants. The options may be chosen on the product page Quick View
Rockbern – Gourmet
KShs1,550.00 -
Chemex 6 Cups
KShs11,150.00 -
Chemex 3 Cup Filter Papers- 100pcs
KShs1,473.20 -
Chemex 6 Cup Filter Papers- 100 pcs
KShs1,508.00


V60 Drip
The Hario V60 is one of the best drip brewers invented in Japan. It derives its name from the angle that forms its V shape. The grooves on the inside of the cone help to support the extraction process. This results in an extremely clean cup.
Brew Guide
3 min
Medium Coarse
17g
250ml/95C
Preparation
First, make sure you have all your equipment within reach. Boil clean filtered water (avoid hard water) to 95 degrees C. Weigh 17g grammes of coffee beans and grind on a medium setting. (We recommend Comandante hand grinder, Conqueco rechargeable burr grinder, or Baratza or Mahlkonig (check our gear shop).
Place your V60 on top of a server or thermal cup and place the filter paper in. Wet the filter paper with hot water. This step will help to pre-warm your thermal cup, get rid of the papery taste and help the filter paper to stick on the V60 during the process.
The Brew
Carefully pour and distribute the ground coffee into the centre of your V60 filter and avoid the wet sides where it may stick. Shake and give the V60 a gentle nudge to flatten the coffee grounds.
First Pour
Check that your water is still at 93-95 degrees. Place the V60 set up together with the thermal cup or server on a digital scale and tare. Start the timer and make the first pour that’s enough to cover the grounds and allow for BLOOM. This allows the air out and allows the coffee to get ready for a balanced extraction. Allow 25 secs.
Second & Third Pour
At 25 secs add more water in a gentle circular motion until the brew reaches 100g.
Allow for 15 secs rest and continue to pour in slow, steady circular motion for another 30 secs until it reaches 175g and pause for 15 sec to allow the water level on the filter to fall. Continue to make the final pour in a gentle circular motion for 30 secs until it reaches 250g when you should stop.
Now watch and indulge in all the aromas of the brew. It should finish brewing/dripping at 3 mins if properly done. If it finishes too quickly or it takes too long, you may need to adjust your grind level. Also check how flat the bed of the left over grounds at the top of the filter are sitting. They are instructive of your pouring skills. However, the most important thing is how good the coffee tastes hence feel free to feed your curiosity and make adjustments.
Final Pour
Once the brew has stopped dripping, remove the V60 and discard your filter and grounds. Pre-warm your mug and Swirl, serve and ENJOY!
Get the Gear
-
Select options This product has multiple variants. The options may be chosen on the product page Quick View
Rockbern – Gourmet
KShs1,550.00 -
Chemex 6 Cups
KShs11,150.00 -
Chemex 3 Cup Filter Papers- 100pcs
KShs1,473.20 -
Chemex 6 Cup Filter Papers- 100 pcs
KShs1,508.00
Aeropress
Aeropress was invented in 2005 by Alan Adler, a Stanford University lecturer in the USA. This equipment has become very popular amongst the coffee aficionados for its versatility and the scope of work it can deliver. It’s a portable and lightweight brewing equipment you can carry with you anywhere. Our Baristas have had experience using the Aeropress and we are excited to share this passion. The underlying principles in an Aeropress are borrowed from the French press and the addition of the rubber seal to harness the pressure and the filter papers results in a clean, sweet extraction with an excellent body in the mouth. Please follow the guidelines below.
What You need!
- Aeropress
- Aeropress filter
- Grinder
- Digital scale
- Aeropress scoop (measures 16g)
- Aeropress paddle or spoon
- Timer
- MUG
Brew Guide
90 sec
Medium
16g
240ml/95C
Preparation
First, make sure you have all your equipment within reach. Boil clean filtered water (avoid hard water) to 95 degrees C. Weigh 16g grammes of coffee beans and grind on a medium setting (equivalent to table salt granules). We recommend Comandante hand grinder, Conqueco rechargeable burr grinder, or Baratza or Mahlkonig (check our gear shop).
STEP 1 FIT YOUR FILTER PAPER
Fit your aeropress cap with the filter paper and place it on top of a cup. Rinse it with hot water, this will help it get a grip and also remove the papery taste. Also prep your equipment by rinsing off with the hot water.
ASSEMBLE AND ADD COFFEE
Place and screw back the basket (cap with the filter) to your aeropress. Pour in the ground coffee slowly and gently shake and nudge to spread the grounds across the filter.
Tare your digital scale.
THE POUR
Start your timer and pour in 240g of water while the aeropress sits on the scale making sure your coffee is fully saturated and wet. Pour to the No 4 or 240g if you are using the scale. The coffee should BLOOM.
Quickly stir the ‘slurry’ (coffee and water) in a clockwise circular motion 2 times to agitate the coffee and anticlockwise once to stop the agitation. Place the plunger on the brew chamber and pull up slightly to create a vacuum or a pressure seal. This will prevent the coffee from dripping. Don’t plunge as yet.
STIR AND PLUNGE
At 75 secs, remove the pressure seal and give the slurry another stir with a spoon or paddle.
Position your aeropress on your cup and place your hand flat on the plunger, with your wrist at a 45 degree angle. Use your other hand to keep the Aeropress steady on the cup. Push down with. gentle, slow consistent force and stop when you hear a hissing sound. If you experience too much resistance, your grind is probably too fine, if you experience least resistance it might be an indication the grind is too coarse.
This method is very clean, unscrew the filter cap, pop the coffee puck and the used filter paper and rinse the aeropress with hot water.
Swirl, serve and ENJOY a coffee with a rich body and a full mouth feel.
Get the Gear
-
Select options This product has multiple variants. The options may be chosen on the product page Quick View
Rockbern – Gourmet
KShs1,550.00 -
Chemex 6 Cups
KShs11,150.00 -
Chemex 3 Cup Filter Papers- 100pcs
KShs1,473.20 -
Chemex 6 Cup Filter Papers- 100 pcs
KShs1,508.00
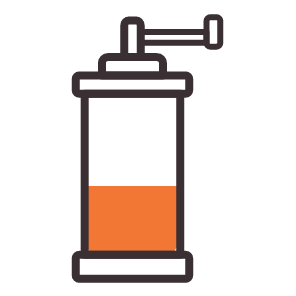
French Press
The French Press is easy to use and consistent. It was invented in 1929. It’s ideal for making many cups in 3-4 mins depending on the size of the French press. This method gives heavy bodied coffee with all the coffee oils.
What You need!
- French Press 12oz/360ml
- Grinder
- Coffee beans or ground. 23g
- Fresh Hot water
- Spoon or coffee paddle
- Digital scale
- Mug
Pre-heat the French Press
Warm up the French press by rinsing it with hot water. This will help in maintaining the coffee temperature through the brew.
Measure the Grind
Measure out 23g of coffee and grind it to a coarse
Add coffee water
Discard any water remnant from the French press and add the ground coffee. Place it on a digital scale and tare. Fill in the water to 100g and saturate all the grounds. Stir with the spoon or the paddle.
Add more water
Now fill all the way to the top or to the 360g. Put the plunger lid on and wait for 3 minutes without pressing it down.
Press
In 3 minutes, you are ready to press. Firmly and gently push the plunger all the way down.
Serve and enjoy
Serve the coffee into the cups immediately without any further ado! If the coffee continues sitting on the French Press it will continue extracting and may be too strong or bitter.
To clean the French Press, please add hot water into the sludge and swirl it and pour it out into a dust bin or use it as compost for your plants.
Get the Gear
-
Select options This product has multiple variants. The options may be chosen on the product page Quick View
Rockbern – Gourmet
KShs1,550.00 -
Chemex 6 Cups
KShs11,150.00 -
Chemex 3 Cup Filter Papers- 100pcs
KShs1,473.20 -
Chemex 6 Cup Filter Papers- 100 pcs
KShs1,508.00